
How to Bandage a Dog’s Leg (Step-by-Step Guide)
Knowing how to bandage your dog’s leg is an incredibly useful skill. You never know when you might be out on a walk and something unexpected happens.
This guide follows a simple, practical approach to applying a temporary dressing, just like you’d use in real-life first aid situations.
⚠️ Important: A bandage is a temporary measure only, always seek veterinary advice if you’re unsure.
When Should You Bandage a Dog’s Leg?
For minor cuts and grazes (to prevent your pet licking them).
For small wounds to feet/lower legs.
If your vet advises you to.
Bandaging can help:
It should be used until you can get your dog to a vet, not as a long-term solution
When Should You NOT Bandage a Dog’s Leg?
If the area is swollen and painful - if it is fractured you could make it worse.
If you think there may be something stuck inside the wound.
If your pet is getting agitated, or showing signs of aggression.
Most cats will not tolerate a bandage being applied.
If you are not confident to do so - a poorly applied bandage could make things worse!
What You’ll Need
Before you start, prepare everything you’ll need:
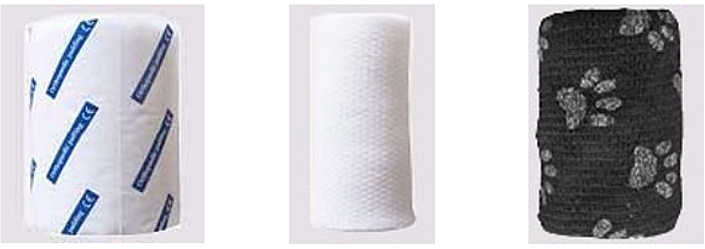
Sterile dressing/non-stick pad
Padding (cotton wool or gauze)
Conforming bandage
Cohesive bandage (vet wrap)
Scissors
Having everything ready before you begin helps to keep everyone calm and makes the whole process much easier to manage.
Step-by-Step: How to Bandage a Dog’s Leg
1. Keep Your Dog Calm & Still
Use a lead if needed
Ask someone to help hold your dog
Stay calm and reassuring
If your dog is in pain, be cautious. Even the least reactive dogs can react differently when they’re in pain.
2. Assess the Injury
Quick check:
Location of the wound
Amount of bleeding
Any foreign objects in the wound
⚠️ Severe bleeding or deep wounds → go straight to the vet.
3. Clean the Wound
Rinse with clean water or sterile saline
Remove any dirt and debris
Gently pat dry with clean towel or gauze pad
Cleaning is essential to reduce the risk of infection
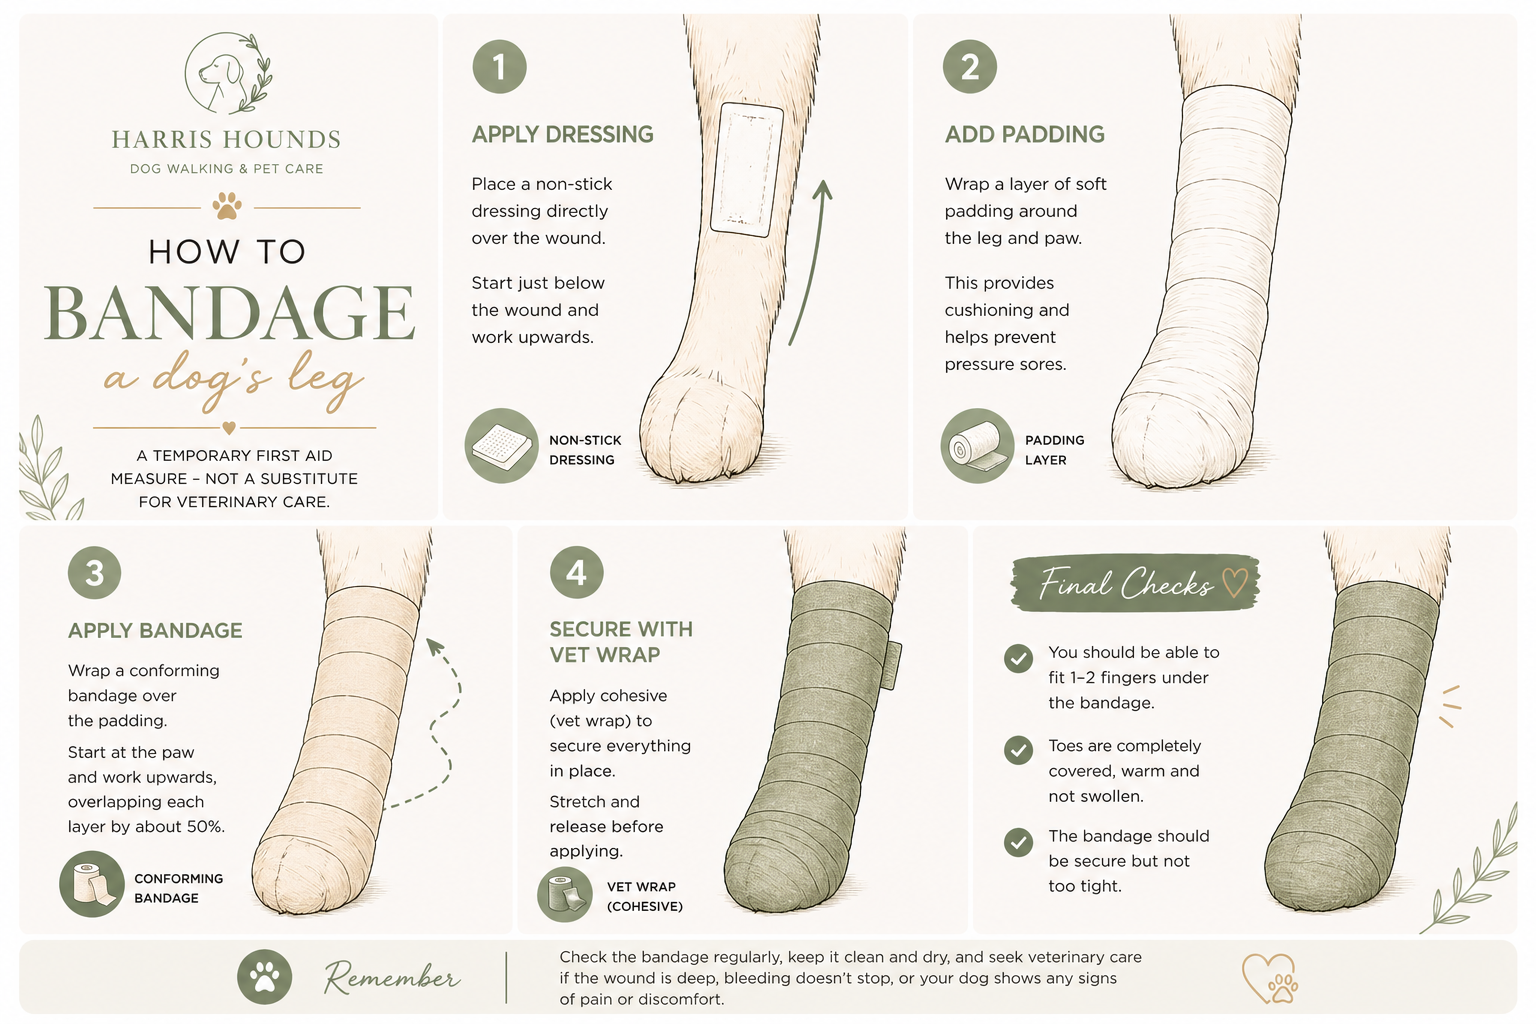
4. Apply the Dressing (FIRST LAYER)
Place a non-stick dressing directly over the wound
This protects the injury and prevents sticking to the rest of the bandage
A dressing protects the wound and promotes healing.
Use a non-adhesive dressing (for small wounds, use scissors to cut them to fit)
Apply one of these to the wound, and secure in place with a small piece of micropore tape
Don’t use cotton wool as a first dressing as it will stick to the wound.
⚠️ Start bandaging just below the wound and work upwards
5. Add Padding (SECOND LAYER)
Layer 1 - padded bandage material (the soft one)
Start with the padded bandage at the top of the paw
Run the bandage down the length of the paw, over their toes, then back along the underside of the paw to the opposite side
Double the padded bandage over on itself back to where you started. Hold this in place with your finger and thumb
Now wrap around the paw (diagonal to step one) to keep in place what you’ve just done
Keep wrapping your way up the leg to above their wrist/ankle, over-lapping each loop by half the bandage width, using even pressure
✔ This prevents rubbing and pressure sores
✔ Provides cushioning
6. Apply the Support Bandage (THIRD LAYER)
Layer 2 - conforming bandage material (the knitted one)
Wrap a the bandage over the padding
Start at the paw and work up the leg
Overlap each layer by about 50%
Repeat steps 1 and 2 above with the conforming bandage going on top of the padded bandage
This creates a secure and even bandage
7. Secure with Vet Wrap (FINAL LAYER)
Layer 3 - vet wrap (cohesive bandage)
Stretch and release vet wrap out before applying as it is very good at tightening up and may cause further injury if too tight
Repeat steps 1 and 2 again with the vet wrap on top of the conforming bandage (loosen/stretch this first to ensure it doesn’t constrict)
Finish the vet wrap layer at the level of the other layers so it doesn’t rub the skin
Check you can get two of your fingers down the dressing and that your pet seems comfortable and check that it can't be easily tugged off
⚠️ This is the layer most likely to be too tight be careful- you should just be able to fit a finger between the bandage and the leg
8. Final Checks (VERY IMPORTANT)
After applying the bandage:
✔ Can you fit 1 finger under it?
✔ Are the toes warm and not swollen?
✔ Is the bandage secure but not tight?
If not, remove and reapply.
A bandage that is too tight can restrict circulation and cause serious damage.
⚠️ Common Mistakes to Avoid
Wrapping too tightly
Leaving gaps or loose areas
Not including the paw
Letting the bandage get wet
Leaving it on too long
Bandages should be checked regularly and changed if needed.
Aftercare
Keep the bandage clean and dry
Change daily (unless advised otherwise)
Monitor for swelling, redness or discomfort
Use a waterproof cover (e.g. bag/boot) outside if wet
When to See a Vet
Seek veterinary care if:
Bleeding doesn’t stop
The wound is deep or large
Your dog is in pain or lame
Swelling develops
The bandage slips or causes irritation
Final Thoughts
As both a veterinary professional and dog walker, I always carry basic first aid supplies because accidents can happen at any time, especially on walks.
Knowing how to apply a simple bandage can make a huge difference to your dog in those first moments.
But remember, if in doubt, always contact your vet.
If you’d like more dog first aid tips, feel free to get in touch 🐾